
Baden-Powell wrote something about fire that holds for everything below: “It is no use learning how to light a fire from hearsay; the only way is to pay attention to the instructions and then practise it yourself.”
Knots
Why it is the first chapter in every scouting handbook.
In Scouting for Boys Baden-Powell tells how he commanded a thousand native scouts on the West Coast of Africa who had nearly two hundred wooden bridges to build. The problem was not courage, it was this: “out of the thousand men, very many did not know how to use an axe to cut down trees, and, except for one company of about sixty, not one of them could tie a knot — not even a bad knot. So they were quite useless for bridge-building.”
“To tie a knot seems a simple thing, and yet there are right ways and wrong ways of doing it, and scouts ought to know the right way. Very often it may happen that lives depend on a knot being properly tied.”
Robert Baden-Powell, Scouting for Boys, 1908A bad knot — the one he calls a granny — is one that either slips when you pull hard on it or jams so tight that you can never get it undone. A good knot holds under any load and comes apart easily when you want it to.
The six that are enough
| The knot | What it is for | Worth remembering |
|---|---|---|
| Reef knot nodul drept / plat | Ties a bandage, a scarf, a parcel, a rolled sleeping bag, a bundle of kindling. | Left over right and under, then right over left and under. Never join two ropes with it if they are going to be pulled on — it gives way under that. |
| Sheet bend nodul de împreunare | Joins two ropes, especially ropes of different thickness. This is the knot that does the job people wrongly ask of the reef knot. | Double it if the ropes differ a lot in thickness. |
| Bowline nodul de scaun | A loop that does not tighten on whatever is inside it. B-P: “for making a loop that will not slip, such as the one you tie round a man when you want to save him from a fire”. | With no load on it, it can work itself loose — add a stopper knot if it is serious. |
| Clove hitch lațul dublu | Fastens the rope to a spar. It starts and finishes the square and diagonal lashings. | It slips if the load changes. It is a working knot, not an anchor. |
| Timber hitch nodul de buștean | Dragging a log — it grips as you pull and falls apart by itself when you stop. It starts the diagonal lashing. | The harder you pull, the better it holds. |
| Figure-of-eight nodul în opt | Stops the end of a rope escaping through an eye or a pulley. | Chosen over the overhand knot because it does not jam: it comes undone easily even after a hard pull. |
Add two more for the tent: two half hitches (fastening the rope to a tree or a ring) and the taut-line hitch, the adjustable one, which you slide to tension the guy lines and which then stays where you put it.
Lashings and pioneering
Pioneering: how you raise things you can stand on out of spars and rope.
A lashing is not a knot — it is the way you wind the rope round two spars so that neither can move against the other. They all work the same way, in three movements: wrapping turns (round the spars), then tightening turns — frappings, that is, turns round the rope itself, the ones that actually squeeze the joint together — and then the finishing knot. The rhythm everyone repeats: two wraps, one frapping.
| The lashing | When you use it |
|---|---|
| Square | Two spars that touch and cross, usually at a right angle. The most used of them all. |
| Diagonal | Two spars that cross but spring apart. It starts with a timber hitch, which pulls them together. This is the lashing that stops a frame racking. |
| Shear | Two spars side by side, eight to ten wrapping turns, then you open them out into an A. Everything that has to stand up and carry weight starts here. |
| Round | Joins two spars end to end, to make one longer. That is how you raise a mast taller than any spar you have in camp. |
| Tripod | Three spars, six to eight wrapping turns. It opens out into the tripod over the fire. |
| Floor | Ties the cross pieces to two stringers and gives you a deck: a table top, a bench seat, the floor of a bridge. |
Everything is built from three pieces
You do not have to learn fifty structures. Almost everything a patrol puts up is assembled from three modules: the A-frame (the base of towers; its horizontal bar carries a floor), the trestle (bridges and towers — and, turned upside down, the cart in the races between patrols) and the tripod.
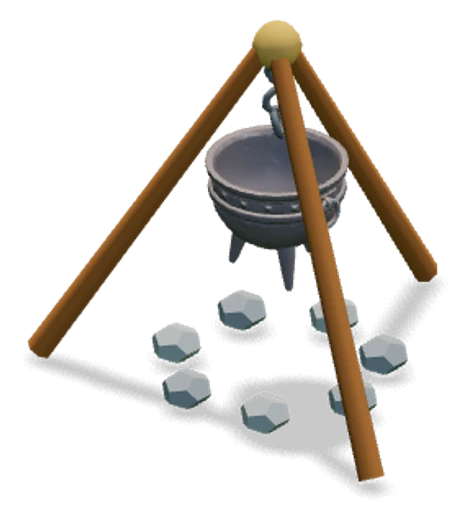
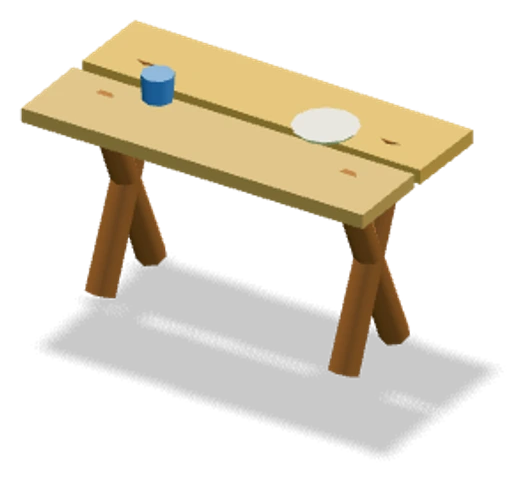
The small ones, the immediately satisfying ones, are called camp gadgets: the tripod for the cauldron, the mess-tin rack, the wash-stand, the boot rack, the kitchen table, the water-bucket stand. They are made from whatever is “lying about”, so that camp is as comfortable as conditions allow.
And at the other end of the scale stand the camp gateway, the monkey bridge, the signal tower and the kitchen raised on two trestles. The patrol gateway is the thing they sign their camp with — and there is a lesson in it: it is built lying down, in two sides, by two teams at once, then joined and raised by everybody together. Nobody raises a gateway alone.
Fire
Safety first, lighting second. That is the order Baden-Powell puts it in too.
“Before lighting your fire, remember to do what every woodsman does: clear away or burn the grass, the bracken and the bushes round the fireplace, so that the fire cannot spread into the grass around it. Many bad fires have been started by tenderfoots playing with blazes they imagined were camp fires.”
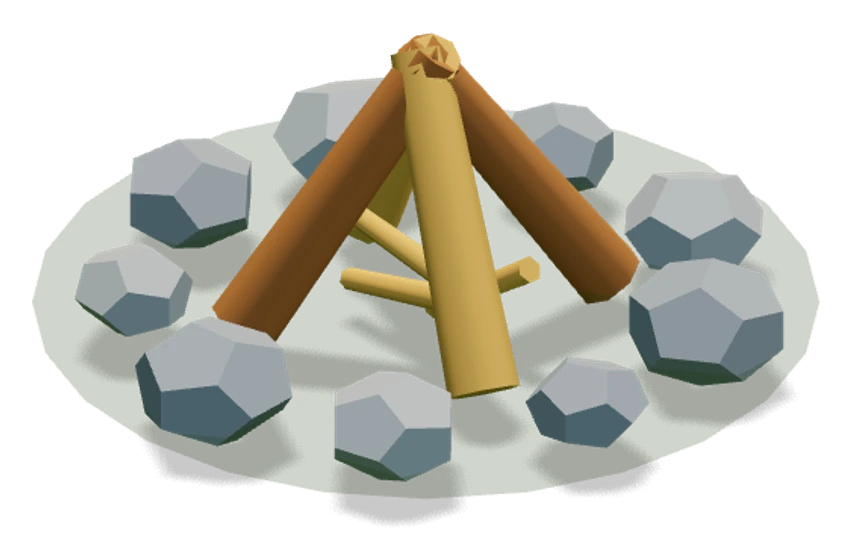
Robert Baden-Powell, Scouting for Boys, 1908Then the method, again in his own words: you start with very small chips of dry, dead wood, gathered loosely into a little heap; on top go small sticks leaning against each other in a pyramid; over those, thicker sticks, also standing up. In other words: tinder, kindling, wood — in that order, never the other way round.
How to lay the fire, according to what you want from it
| The lay | What it looks like | What it is good for |
|---|---|---|
| Pyramid | Tinder in the middle, kindling leaning into a cone, the opening facing the wind. | The easiest to light. A tall, vertical flame, straight under the cauldron. Eats wood fast. |
| Log cabin | A small pyramid inside, then logs stacked in layers at right angles, getting smaller towards the top. | It makes embers and burns a long time without your touching it. The fire for the cauldron, and for a meal you want to be left alone with. |
| Star | Three thick logs laid like the spokes of a wheel, their ends in the middle of the fire; you push them in towards the centre as they burn. | B-P’s choice: “a fire made in this way need never go out”. You do not cut the wood to length, it uses very little, and it makes little flame and little smoke. |
| Lean-to | The tinder tucked against a thick log, the kindling leaning on it. | Wind and rain: the log is both windbreak and roof. |
| Parallel | Two thick logs a hand’s width apart, the fire between them, the thick end facing the wind. | A hotplate: the pots stand straight on the logs. B-P’s camp kitchen, exactly this. |
| Reflector | A wall of logs behind the fire. | It throws the heat forwards, towards you, on a cold night. |
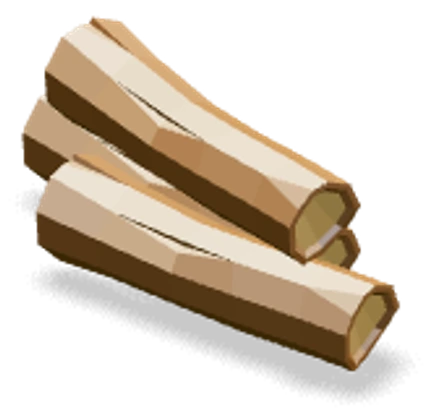
The wood matters. The hardwoods — beech and oak — burn slowly and evenly and make embers; they are the wood for the cauldron. The conifers — spruce, fir, pine — catch quickly, crack and throw sparks and are gone in no time. (And B-P adds a trade superstition: never poplar for the cooking tripod, “because old-fashioned scouts believe it brings bad luck to the cooking”.)
The rules that are not up for discussion
- Hair tied back, neckerchief tucked in, no loose sleeves, no flapping clothes. Closed shoes.
- Clear everything that burns for at least a metre and a half in every direction.
- Water or a spade within reach, the whole time. One bucket is the minimum.
- A fire is never left unattended. Not for a minute.
- It is put out with water, not soil: spread the embers, sprinkle, turn them over with a branch, sprinkle again. The final test: you must be able to hold your palm over the ashes.
The camp rule that leaves no trace: do not fell living trees and leave the big logs alone (they are homes for animals) — gather only wood you can break with your hands, over a wide area, well away from camp. And never a fire against rocks: the black mark stays on them for years.
Cooking at the cauldron
You adjust the heat by raising the pot, not by building up the flame.
The rig is simple: a tripod of three green spars lashed at the top, with the cauldron hung from a chain or a wire. You raise or lower the pot, you rake the embers under it or pull them away — that is the throttle. Big flames do not cook, they only smoke the food.
“Hunter’s stew: cut the meat into pieces about three centimetres across. Clean and cut up the vegetables — potatoes, carrots, onions — and put them in the cauldron. Add clean water until it is half full. Mix flour, salt and pepper, roll the meat in it and put that in as well. The water should only just cover the food — no more. Leave the cauldron in the embers to simmer for about an hour and a quarter. The potatoes take the longest. When they are soft, the whole stew is ready.”
Baden-Powell, the 1908 recipe — essentially a bograciBread without an oven: you make a dough, cut a strip two fingers wide, wind it in a spiral round a thick stick that you have barked and warmed in the fire, then plant the stick beside the embers and turn it now and then. It is called a răsucită, a twist, and it is the first thing any child asks for on the second day.
And one small, perfect trick from the same page: to find out whether the water is boiling without lifting the lid, hold the end of a stick against the pot — if it is boiling, you feel it tremble.
Here, the cast-iron cauldron on its tripod, over beech or oak, means goulash, bograci, tocăniță, beans with smoked hock, ciorbă, pilaf and mămăligă (polenta) alongside. It is stirred and watched in shifts, with a long-handled wooden spoon. The cauldron is washed with warm water and a soft sponge, no harsh detergent, dried at once and wiped over with a film of oil.
But the point of the exercise is not the food, it is the organisation: the patrol cook, the rota for washing up, the hygiene rules, and the fact that the patrol eats exactly what the patrol cooked. Baden-Powell tells how, as a beginner, he served pea flour and water as “soup” and was made to eat it himself. It is a lesson about responsibility, not about cooking.
Map and compass
Three steps, in this order, every time.
A scout’s compass has a transparent baseplate with a ruler edge, a rotating housing marked 0–360°, the magnetic needle with its red end pointing north, an orienting arrow drawn on the floor of the housing — the one they call the shed — and a direction-of-travel arrow on the baseplate.
- Put the compass on the map The ruler edge should make a straight line between where you are and where you want to get to. Check twice that the direction-of-travel arrow points towards your destination, not the other way round — this is every beginner’s number one mistake.
- Turn the housing Until the lines inside it are parallel with the north–south lines of the map, with the north of the housing towards the north of the map. The needle is ignored completely at this step — for now the compass is only a protractor.
- Lift the compass off the map Hold it flat in front of you and turn yourself, your whole body, until the red end of the needle sits in the shed. Red in the shed. Now walk where the direction-of-travel arrow points.
On the ground, the rule that counts: do not walk with your eyes in the compass. Sight a tree or a rock on your line, walk to it, then take the bearing again. Otherwise you drift off without noticing.
Declination — and why the rule in the English books is back to front here
Compass north is not map north. In Romania the difference is about 6° East in the west of the country (5.9° at Timișoara), rising to 7° in the north-east. Because declination here is easterly, the conversion runs the opposite way to the rule every British manual teaches:
compass bearing = map bearing − 6° · map bearing = compass bearing + 6°
How much does it matter? One degree is about 17 metres off course for every kilometre. Ignore the 6° and you come out some hundred metres wide of your target after a kilometre. On a path, nothing. On a mountainside in fog, everything.
The techniques that make the difference
Setting the map
Turn the map, not yourself, until its north lines up with north on the ground. Then everything you can see in front of you is also in front of you on the map. It is the skill with the biggest return of them all.
Thumbing the map
Fold the map small and keep your thumb exactly on your position, moving it as you go. You never have to hunt for yourself on the map again.
Handrail
A path, a fence, a stream, the edge of the forest — a line you simply walk along. The beginner’s safety net.
Backstop
An unmistakable line beyond your target, which tells you that you have gone past it. It gives you the nerve to walk fast.
Attack point
A big, obvious feature next to the target. Walk fast and roughly as far as that, then slowly and exactly — bearing and paces — for the last hundred metres.
Aiming off
Looking for a bridge over a stream? Aim deliberately to the left of it. When you hit the stream you know you have to turn right. If you aim exactly at it, you have no idea which way to go.
Pacing
When there is no landmark, you measure the way with your own legs.
A “pace”, in orienteering, means a double pace: you count one foot only, each time it touches the ground. An adult walking on flat ground takes about 60–64 double paces to 100 metres. Running on a good path, about 40; the same person, through forest, nearly 50 — a quarter more, from the ground alone.
How to find your own number: measure out 100 metres on flat ground, walk it counting one foot only, repeat three to five times until the figure settles, round to the nearest 5. Then measure again going up, going down and through thick undergrowth — those are three different numbers. Over long distances, move a pebble from one pocket to the other every hundred metres, so that you do not lose count.
And the honest part: there is no table anywhere that tells you how many paces a twelve-year-old takes. Nobody can give you your number. You measure it yourself — and you measure it again as you grow.
North without a compass
Three methods that work, and one that does not work at all.
The stick and the shadow
Push a stick about a metre long into the ground and mark the tip of its shadow. Wait a quarter of an hour and mark it again. The line from the first mark to the second runs roughly west→east. Put the first mark at your left foot and the second at your right, and you are facing north. Accuracy: 10–15°, best in the middle of the day.
The watch with hands
B-P: “hold your watch flat, face upwards, so that the sun shines on it. Turn it round until the hour hand points at the sun. Then lay the edge of a piece of paper across the face, through the centre, halfway between the figure XII and the hour hand. That line gives you true north and south.” It works because the hour hand goes round twice a day and the sun only once — by halving the angle you cancel the factor of two.
In summer here, halve the angle from 1 o’clock, not from 12 — because of daylight saving. And treat the method as a fine demonstration, not as navigation: the error can pass 80° in unlucky cases.
The stars
The two stars at the end of the “bowl” of the Plough (the Big Dipper) point at the Pole Star: carry the distance between them on about five times. If the forest hides the Plough, look for Cassiopeia — the W on the other side of the pole, at roughly the same distance.
Two things you can check for yourself, from Oradea: at our latitude the Plough never sets, and the Pole Star stands at a height equal to the latitude — that is, around 47°, about halfway between the horizon and straight overhead, some four and a half fists held out at arm’s length.
Trail signs
In 1908 there were four. Just four.
Most of the lists on the internet inflate them. Baden-Powell’s originals are these:
- Road to be followed — an arrow.
- Letter hidden three paces in the direction of the arrow — the arrow, plus the number of paces.
- This way is not to be followed — a bar laid across the path.
- I have gone home — a circle with a dot in the middle.
Three details from the original that nobody quotes any more, and they are the best of it. The first: you sign your work — the scout draws the head of his patrol animal beside the sign, with his own number to the left of it, so that the sign says who left it. The second: the night version — “sticks with a wisp of grass tied round them, laid on the road in the same shapes, so that they can be felt with the hand”. A trail you read with your fingers, in the dark. The third: you practise it with chalk on the floor, or with a stick in sand.
The set used today adds: turn left, turn right, this way over the obstacle, the group has split (an arrow that forks, with the number who went each way), message in this direction, water, danger. They are made from twigs, sticks and pebbles — never cut into living trees — and they are collected on the way back. “I have gone home” is always the last sign left.
Kim’s Game
The oldest scouting game there is — and it has been in Romanian since 1915.
It comes from Rudyard Kipling’s novel Kim (1901), where the boy is trained by Mr Lurgan with what the book calls “the Jewel Game”: fifteen precious stones thrown down on a tray, then objects, then photographs. Lurgan’s line is the one to say to children: “Do it many times over till it is done perfectly — for it is worth doing.” Baden-Powell took it over in 1908 and named it after the character.
The original rule: you put twenty to thirty small objects on a tray and cover them. You uncover them for exactly one minute. You cover them again. Then you take each scout aside and have them whisper to you what they remember, ticking it off on a list prepared beforehand. Whoever remembers the most wins.
Two details the modern versions lose and should not: the whispering (so that nobody copies) and the score sheet made in advance (the game is measured, not judged by eye).
Animal tracks
Do not learn a hundred pictures. Learn the architecture of the foot.
“To become a good scout at tracking you must begin young and practise it whenever you are out for a walk, whether in town or in the country… it is a very useful habit, and it makes even the dullest walk interesting.”
Robert Baden-Powell, Scouting for Boys| What you see | Who it is |
|---|---|
| Two crescents (cloven hoof) | Roe deer — narrow, pointed at the front. Wild boar — broad, round, blunt, and with the dew claws printed outside and behind on soft ground: the boar’s signature. |
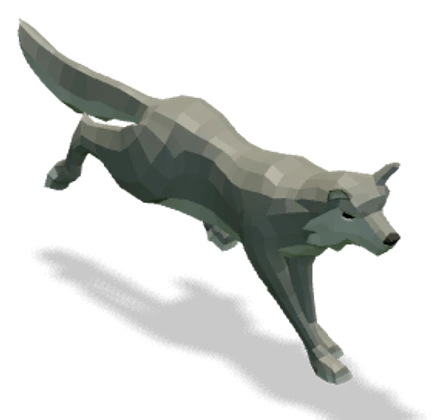
| Four toes + claw marks | The dog family: fox, dog, wolf. |
| Four toes, no claws | The cats — lynx or house cat. The claws retract. |
| Five toes | Badger — a broad pad, five toes in an arc, and long digging claws printed well in front of the toes: the easiest track to recognise in Europe. The pine marten has the same architecture, much smaller. |
| The hind feet land IN FRONT OF the front feet | Hare and squirrel. The trail looks as though it runs backwards — in fact the animal is heading towards the large pair. It surprises everybody, and that is why it sticks. |
| Three toes forward, one behind | Birds. The ones that hop leave prints in pairs; the ones that walk — crow, magpie, stork, pheasant — leave alternating prints. Ducks leave the web between the toes. |
Fox or dog? The answer is not in the print, it is in the trail
The fox walks “in direct register”: the hind feet fall exactly on the prints of the front ones, and all of them on a single line, never stepping out to the side — the trail looks like a string of beads. A straight line, as if along a wire: an animal that is going somewhere. A dog’s trail wanders and steps out sideways, because a dog on a walk is investigating.
The fox walks the wire; the dog goes for a stroll.
Signs when there is no mud
Roe deer droppings are small and cylindrical, with one pointed end and one dimpled — black and glossy when fresh, brown and dull when old, which also gives you a rough age. Gnawed cones: a squirrel leaves a ragged core with a tuft at the tip; a woodpecker wedges the cone into an “anvil” in the bark and leaves a pile under the same tree. Stripped bark: deer pull with their lower incisors upwards, vertically; sheep browse across — and the height tells you how big the animal is. Badger hair left on the bottom wire of a fence is coarse, banded black-white-black, and rolls between your fingers. A feather with a chewed quill means a mammal caught the bird; plucked clean, it was a bird of prey.
Trees and birds
Fifteen plus fifteen. That is all it takes to stop walking through the forest like a stranger.
Our forests are stacked in belts: the oak belt in the lowlands and hills, the beech belt from about 400–500 m up to around 1,300–1,400 m, then the spruce belt. Climbing towards Stâna de Vale, you pass through all three in one morning.
| The tree | The sign you know it by for certain |
|---|---|
| Beech (fag) | Smooth grey bark, like elephant skin. An oval, pointed leaf with a wavy edge, never toothed. |
| Hornbeam (carpen) | The beech’s double: the leaf is doubly toothed, and the trunk is fluted and muscular, not round. |
| Pedunculate oak (stejar) | A lobed leaf with almost no stalk, with two little ears gripping the twig; acorns on long stalks. |
| Sessile oak (gorun) | Exactly the other way round: the leaf has a stalk, the acorn does not. |
| Birch (mesteacăn) | White bark, like paper, that peels, with black diamonds. A small, triangular leaf. |
| Spruce (molid) | Needles sharp, four-sided, all the way round the twig — they prick. The cones HANG DOWN and fall whole. |
| Silver fir (brad) | Needles flat, soft, blunt, with two white stripes underneath, combed into two rows. The cones STAND UP and fall apart on the tree — you will never find a whole fir cone on the ground. |
| Pine (pin) | Needles in twos; the upper part of the trunk orange-pink, and flaking. |
| Lime (tei) | A heart-shaped leaf, lopsided at the base. In June the whole tree smells of honey and hums. |
| Ash (frasin) | Black, velvety buds — the easiest tree in Europe to recognise in winter, with no leaves at all. |
| Maple / sycamore (arțar / paltin) | Lobed leaves opposite each other on the twig + “helicopter” seeds. |
| Willow (salcie) | Long, narrow leaves, silver underneath. Always near water. |
| Aspen (plop tremurător) | The leaf stalk is flattened, so it trembles in the faintest breath of air. The only tree you recognise with your ears. |
| Hazel (alun) | A round, hairy leaf, like sandpaper. Catkins in February, when nothing else has flowered yet. |
| Elder (soc) | Break off a twig: soft white pith inside. White flowers in wide plates, black berries. |
Birds — and their sound
| The bird | What it looks like | What it sounds like |
|---|---|---|
| Great tit (pițigoi mare) | A yellow belly cut by a black stripe, white cheeks. | “tea-cher, tea-cher” — the first song of the end of winter. |
| Blackbird (mierlă) | Pitch black, with a yellow-orange bill and eye-ring. | Slow, low, like a flute, unhurried, from a rooftop at dusk. |
| Chaffinch (cinteză) | Two broad white bars on the wing. | A rattle that speeds up and ends in a flourish. |
| Cuckoo (cuc) | Grey, long-tailed; in flight it looks like a sparrowhawk. | It says its own name. Only the male, from April to the end of June. |
| Great spotted woodpecker (ciocănitoare pestriță) | Black and white, red under the tail. | It does not sing — it drums: some 40 strikes a second, each burst under a second long. |
| Black woodpecker (ciocănitoare neagră) | The size of a crow, all black, with a red crown. | Bursts of 2–3 seconds, heard a kilometre away. |
| Jay (gaiță) | A barred blue patch on the wing, white rump. | The forest’s alarm bell — a dry, rasping screech. If you learn one bird only, learn this one: when the jay screeches, something is moving. |
| Tawny owl (huhurez mic) | A round head, big black eyes, no “ears”. | The female “ke-wick”, the male “hoo-hooo” — the famous “twit-twoo” is in fact two birds answering each other, not one. |
| White stork (barză albă) | White, with black flight feathers, red bill and legs. | It cannot sing — it clatters its bill, with its head thrown back. |
| Hoopoe (pupăză) | Orange-pink, with barred wings and a fanning crest. | A soft “oop-oop-oop”. You may know it already from Creangă. |
| Swallow (rândunică) | A deeply forked tail, with long streamers; a red throat. | A quick twitter that ends in a dry rasp. |
| Common buzzard (șorecar comun) | The everyday bird of prey that circles over the fields. | A long drawn-out mewing, like a cat. |
Reading the weather
Three sayings that work — and all three are, in fact, the same saying.
Red sky at night
“Red sky at night, shepherd’s delight; red sky in the morning, shepherd’s warning.” True, and there is a mechanism behind it. A bright red needs dry, dusty, cloudless air — that is, high pressure. In the evening you are looking west, where the weather comes from: red means the high pressure is on its way. In the morning you are looking east: it has already gone past.
Mackerel sky
Cirrus (“mares’ tails”) plus small waves of cloud, taking over the sky bit by bit: precipitation in 6–12 hours. What counts is the invasion, not an isolated patch.
A halo round the sun or the moon
The 22° ring forms by refraction in the ice crystals of the thin cloud at the edge of a warm front: rain or snow within 12–24 hours. You can measure it: an open hand, at arm’s length, covers about 20°.
And now the important thing: all three are the same rule. All three detect the high ice clouds that run ahead of a front. A child who understands that has understood the weather at our latitudes — they have not memorised three proverbs.
The sign that matters most is the cumulonimbus: the tower of cloud with its top spread out like an anvil. It brings hard showers, thunder, hail and squalls. The anvil is the signal to get off the ridge, not to take one more photo.
What you never do
The short part of the handbook, and the only part with no exceptions.
The death cap (Amanita phalloides) looks like edible species, there is no folk test that gives it away, and the symptoms only appear after 6–24 hours — by which time the liver is already destroyed. The silver spoon, “insects don’t eat it”, “the cap peels” — all of them are myths that have killed people. Mushrooms are not a scouting skill, they are a specialist’s skill. Our activity is to recognise them and photograph them, not to eat them.
Dangerous plants that grow here too: hemlock (a tall stem with purple blotches, the crushed leaves smell foul — it is easily confused with parsley and wild dill) and deadly nightshade, whose glossy black berries look sweet, and a few of which can kill a child. There are also thorn apple (laur), yew, monkshood and autumn crocus.
What you can have instead, and it is a pleasure: blackberries — the only wild European fruit that is impossible to confuse with anything dangerous, and for that reason the first one a child learns. Then rosehips, bilberries, raspberries, nettle (it stings raw, it is mild boiled — and the burdock that cures it usually grows right beside it) and sorrel, sharp as lemon, but a nibble, not a salad.
All of this is learned in a single week a year
The rest of the year you practise it on Saturdays. And the first time you actually need it, it does not feel like play at all.
See what camp is like →